You will need
- - passe;
- - canvas or other plain fabric;
- - stretchers or stands;
- - color braid;
- - tailor pins;
- - plastic clips;
- - PVA glue.
Instruction
Any work of art looks better if you place it in a frame. It could be a passe. Glass in this case is not necessary. You can make them yourself or teach the children. The ability to design work will be useful to them more than once. For each work you need 2 sheets of cardboard of the same format, a little more than the picture itself. Since the frame will have to be attached to fabric, tape or tape, the cardboard should not be very thick. Regular packaging is pretty plain-looking, so make a base out of it. Frame cut out of color. Its external sides must coincide with the sides of the base. Make the inner perimeter of the frame a little less than the perimeter of the work. Paste the pattern on the base, glue the frame on top. The upper part can be made from self-adhesive film.
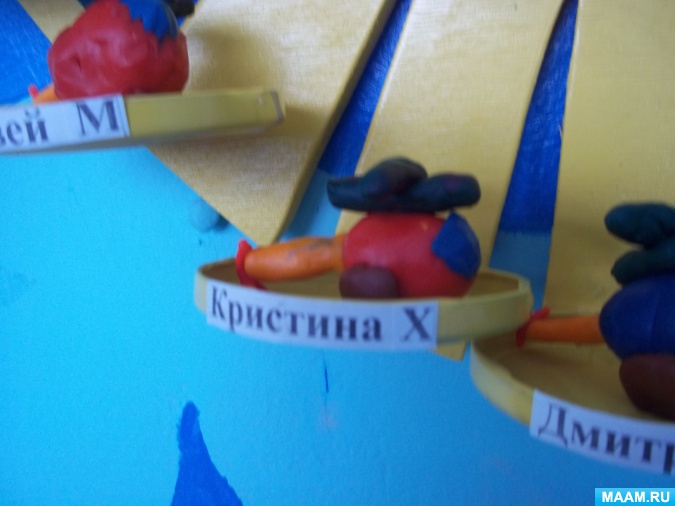
Sign work. You can make cards on the computer, writing the name and age of the artist, as well as the name and material of the work - exactly as it is done in museums. Stick the card to the frame or attach to the canvas.
Put together a few square or rectangular subframes. You can fasten 4 slats together in the form of a “window” and wrap them with canvas or another monophonic cloth. In this case, the canvas should not be glued or primed.
Arrange all works so that they do not overlap each other. Viewers should be able to view all the crafts in detail. Higher work position on the far background. Place the crafts lower in front. Such a staggered arrangement of crafts will ensure a smooth transition from one exhibit to another when viewed.
When you design an exhibition of handicrafts made from natural materials (for example, vegetables, fruits, moss, etc.), consider the fact that the material used has deteriorated. Daily review crafts, eliminating tainted work. As a rule, the duration of such exhibitions is limited.
Create a good atmosphere with the help of the image of heroes of fairy tales and cartoons, flowers and funny little animals. The color scheme should be bright and colorful.
Make some stands with useful information not only for children, but also for parents. Dedicate them to nutrition, sports and physical development, as well as child psychology and general advice on the upbringing of babies. Draw yourself or order a few posters. For example, “Different Professions”, “Seasons” or “Days of the Week”. On the children's lockers attach stickers with funny pictures.
Think about the overall theme of the group. It can be a fabulous, sea or forest story. When you choose one particular style, try to stick to it as much as possible.
Helpful advice
The materials used in the design of the children's group should be of high quality, environmentally friendly and resistant to abrasion. Furniture must meet all the necessary state-of-the-art standards and standards.
Sources:
- group decoration in kindergarten
Methodical room - the center of all educational work, which is held in kindergarten. Here are held pedsovety, advice for educators, here teachers take literature and study aids. In large departments of education there are citywide methodical classrooms. Their equipment is different from the kindergarten, but the design principles are about the same.
You will need
- - suitable premises;
- - comfortable and aesthetic furniture;
- - information stands;
- - literature in various areas of pedagogy;
- - own teaching materials of teachers;
- - toys and manuals;
- - technical training tools.
Instruction
Choose a suitable room. The premises for the kindergarten methodical study are usually provided for by the project. In institutions of supplementary education, schools and departments of education, managers often have to decide for themselves where the cabinet will be. This should be a fairly spacious room that meets fire safety requirements. Decide whether you will use it for pedsovetov or whether there is any other room for them. In the first case, all educators should be accommodated in a methodical study.
Design start with painting the walls. Light walls create a joyful calm mood. Use cream, beige, pink colors. Cold tones are not very appropriate.
Ekaterina Rasheva
our group is called "Sunny", so I wanted to reflect this in reception room including so way:
1. we put on the plywood 10 mm drawing of the sun, with the number of rays equal to the number of children with a margin (in this case, 21)
2. we saw out the sun in an electric jigsaw
3. We clean sandpaper
4. We fasten metal covers with a bottom down onto each beam on the screws. (reusable)
4. We paint from a barrel, but it is possible and a brush
5. On the end side of the covers we paste the printed names of the children. (in this case on scotch)
6. Attach a cropped file in the center for the necessary information. (Now you can buy a thick transparent pockets)
7. Attach the sun to the wall in a convenient location.
Such a sun can be used for craft from plasticineas made from natural material, paper, etc.
It is possible to put circles from a dense film in covers in order that covers from plasticine and glue did not get dirty.
The wall around the sun can be decorated with clouds, birds, rainbow

Publications on the topic:
As the theater begins with a hanger, so the kindergarten begins with a group room. We called our group "Daisies". Therefore, the reception is framed.
How does kindergarten begin for each baby and for each parent? Of course with the reception. Therefore, the design of the reception must comply.
Making a group in kindergarten is part of the pedagogical process on which the prosperous psycho-physiological condition depends.
Registration of the reception group - "Creative workshops". So - in our reception group there is a corner for parents, which is called "Creative.
Tomorrow there will come a great and important holiday, May 9, DAY OF VICTORY. In our preschool last week was well under way preparation.
In our kindergarten "Spikelet" recently held a competition design of the receiving group in the same style. Our group is called "Naughty Cossacks".
Every year the theme week for the holiday "Defender of the Fatherland Day" is held in our wonderful preschool institution. In all age.
Currently, there are a lot of fires all over the world, forests are burning. It affects not only people, but also forest dwellers, beauty.
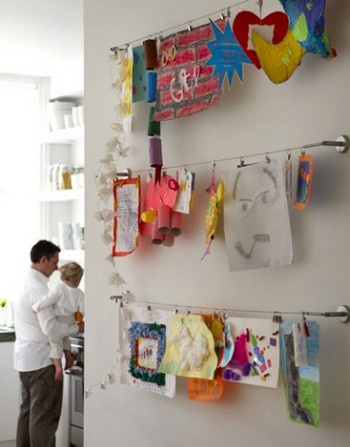
Bright ribbons or ropes and clothespins also serve as a great display.
Frame, rope and exhibition is ready:
The display can be built and not on the walls, but to do something similar from ordinary thick wire, wood, or whatever is available:

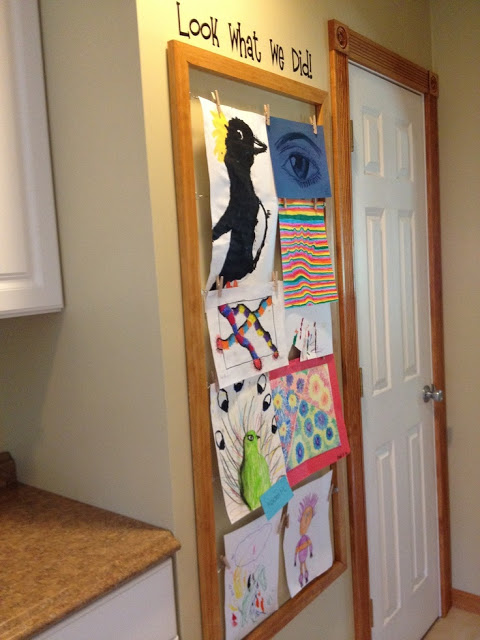
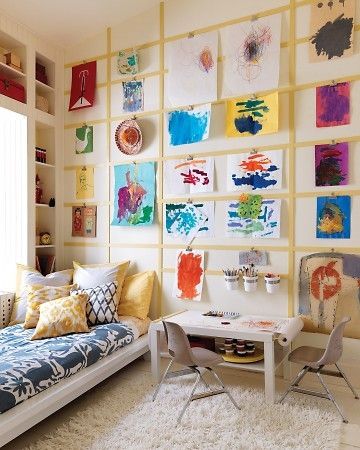
Attach to the wall wooden slats to which you can attach the pictures:
Some tips:
No matter how you gather to organize children's drawings, before sending them to storage, make sure you don’t forget to sign the project, age or category, as well as other useful information about the work. It seems to you that you will always remember at what point the drawing was made, but believe me, everything is not possible to remember. Ultimately you may forget. Therefore, it is better if the works are sorted and marked. As an option, you can attach a photo of your child to the box or folder where you store, so as not to forget which of your children painted this or that work.
You can create several boxes, one in which you will be putting the most favorite works and which you would like to keep for memory. The second is for temporary storage, so that your child can improve the drawing during the school year. So you can compare the pictures, reflect with the children how they can be improved.
Talk to your children and break up the works that you would like to save into categories. Do not keep work that does not make sense to keep. Identify criteria with children. Sometimes in the eyes of children, some works that we may not like, look in a special way. You can assume that these pictures can be thrown away, and your children - quite the opposite. There is nothing worse if you throw away some childish work, and the child asks you to show it over time. Determining with the children the worth of work and drawings that can be thrown away is also learning, because you cannot save everything.
Take photos of the best artwork. Often, children are ready to leave with some work if they know that you have their photos. Create a separate folder on your computer where you will store such works and from time to time to view them with your children. Create subfolders and sort photos of pictures into categories for quick search. Do not forget about the file names or even write the name, the name of the child who created the work and the date of creation or the age of the child in the text file. Such photos you can also use to create gift calendars, posters or photo albums for yourself or your relatives.
Make a video! Take pictures of how your child paints, sculpts or makes an appliqué. Children love to look at themselves and their creativity. Make small videos, also save these files to your computer. In the future, using simple programs, you can put these short films into a small film by burning it to home for TV on TV. How nice to look back, isn't it?

Blog ›How to choose a baby car seat
Registration of the exhibition of children's crafts in the reception
A ball of flowers with their own hands, instructions, photos
Assistant teacher: requirements and opportunities
Racks for toys and books in the nursery