Surely cat owners have often noticed that their pets are more willing to play with items found by chance in the apartment than with toys from the store. The reasons for this behavior of animals are inexplicable, but the fact remains. Therefore, instead of once again spending money on toys for cats, it is better to make them yourself from improvised materials. We share simple ideas that will tell you how to entertain your pet simply and quickly.
1. Play station for furry explorers
Glue toilet paper rolls in various positions onto a sturdy piece of cardboard. Inside them, put the little things that attract the attention of the cat - for example, large buttons, beads. The cat will try to get them.
2. For a few pennies

In the base of the toilet paper roll, make several holes in a chaotic manner. Pass cocktail tubes, bright shreds or pompoms through them. Such a toy will take the animal for a long time.
3. From your favorite cardboard box

Everyone knows the fact that cats are not indifferent to cardboard boxes. Use this feature of theirs and make a gaming station out of the box. Inside the box are small items, and on top are bright cords that will also attract the attention of the cat.
4. Mini tangle with protection

Letting your cat play with regular balls or spools can be dangerous as he can choke on the thread. Therefore, we propose to slightly modernize this option for entertaining a cat. Roll the thread into a ball of medium density, leaving one end free. Then wrap the ball with plain foil. Cats love its rustling and soft sheen.
5. The second life of the remnants of water pipes

From the remains of water pipes, you can make a toy for a cat with your own hands. It is only necessary to connect them with the help of corner elements, which are sold in any hardware store. You will also need to cut holes in the pipes a little more than the paws of cats, and put various little things inside. The cat will try to get them.
6. Soft pom-poms

Pompoms on a string are a favorite toy of many cats, which does not bother them for a long time. Ready-made toys can be hung on the doorknob so that the cat tries to get them.

7. Making a sommelier out of a cat

Cats love to play with wine corks because they are light. You can just give the cat a cork, but if you have some free time, make a more complex toy. For example, crochet it or attach bright feathers, ribbons.

8. For needlewomen who are friends with a needle
A person who knows how to handle a needle can sew a simple toy for a cat in a couple of minutes. We recommend choosing fabrics of sufficient density, such as wool or felt.

9. From a T-shirt that gathers dust in the closet

To make such a cat toy with your own hands, you will need an old knitted T-shirt. Cut it into thin strips, put them together and tie in a knot. To make it more interesting for the cat, we recommend using T-shirts of different colors and knitwear that differ in density.
10. Recycling corrugated board

Corrugated cardboard, from which large boxes are made, is useful for creating toys for a cat. Cut out a lot of circles from it, in each of them make a small hole in the middle. Then string them on a piece of lace, tying it into knots.
11. Bright shreds for the cat

Cut into square pieces. To fill them, foam rubber, fabric scraps, threads are suitable. In order for the bag to arouse increased interest of the cat, you can put a little catnip inside it.
12. If a baby sock is left without a pair

Using the method described in the previous paragraph, it will turn out to make a toy for a cat with your own hands from a children's sock. Just fill it with something soft and tie it in a knot.
13. Cat rod

A thin wooden stick, strong thread and flat thin fabric - that's all you need to make a cat fishing rod. Fold the fabric with an overlap, use a needle to thread a thread through the strips. Tie the free end of the thread around the stick.
When the issue of entertaining cats is resolved, a lot of free time is released. Why not spend it on improving the interior of your home? For example, familiarize yourself with
For each of us, a home is a cozy room, a warm hearth, delicious food, a sincere atmosphere, and for many, a beloved domestic cat, which, like us, needs its own secluded corner. Of course, a beautiful house can also be purchased at a pet store, but it’s better to make it yourself, especially since we have 13 wonderful options with detailed instructions on the photo.
solar tent
Everyone can make such a tent for a cat. All you need is a bright T-shirt, a couple of wire hangers and cardboard.
materials
So, get ready: T-shirt, thick square cardboard, two wire hangers, duct tape, pins, pliers.

Cut off the ends (hooks) of the hangers.

We make racks from hangers. For density and smoothness, glue the cardboard around the edges with tape.

We make small holes (to hold the wire tightly) in each corner.

We cross the wires and fix the top with tape. Check that the legs of the rack are touching the corners of the cardboard. Insert them into the holes.


Bend the ends of the wire from the back. 
For ease of movement of the tent, seal the protruding bends with tape.

The frame is ready. Make sure the wire racks are symmetrical. Trim them with pliers if necessary.

We fit the frame with a T-shirt, folding it as shown in the photo below. The T-shirt must be pulled tight enough.


Put a soft pillow or blanket inside and present the new thing to your cat!


cardboard tower
A structure made of layers of corrugated cardboard for a cat looks very aesthetically pleasing and unusual. Repeat after us and you will get the same!
materials
Prepare corrugated cardboard, cutter, pencil, compasses, glue, brush.


Draw circles
First of all, let's draw the layouts of our cardboard disks, located one above the other. The result will be 8 groups of 4 or 5 disks of a certain size. The dimensions will depend on the size of your pet, but in our example, the radii are as follows:
- 21.5 cm
- 21 cm
- 20.5 cm
- 20 cm
- 19.5 cm
- 19 cm
- 18.5 cm
- 18 cm


Cut out along the drawn circles.


Basic circles for the bottom
Now we form the base of our house. We cut out a solid disk with a radius of 21.5 cm (without a hole inside), then draw exactly the same 6 disks, but with a hole (we measure 4 cm from the edge in the same way).

We impose disks on a solid base.

We collect the pyramid.


Draw the entrance
We measure the height of the opening and remove the excess top. We draw the borders of the door. You can draw any shape.


On each disk we make marks of the boundaries of the opening.

Cut out the door
According to the marked signs, draw straight cut lines on the disks. It is important to determine their correct angle of inclination.


Collecting circles again 


We glue the disks into a pyramid


Let's call the cat!
After the design is completely dry, we equip a soft spot inside and delight your beloved pet.


Luxurious sofa for an important kitty
How long can you take a cat's favorite place on the couch? Finally, sew him your own. And don't forget the bows!


Prepare for work:warm fabric (in our example, velveteen), material for the bottom of the sofa, material for interior decoration, synthetic winterizer, scissors, threads, needles and a sewing machine.
We draw the layout. Dimensions are determined by the size of the animal. The optimal width of the sidewall is 20 cm.

The bottom consists of dense fabric from below, a synthetic winterizer and velveteen from above.

Sew the layers.


We cut the sidewall. Sew along the edges, leaving one side unsewn.


Fasten the sidewall to the bottom first with pins.

We fill it with sintepuh.

Sewing up the hole.

Now it's time for the sofa cushions. We also fill it with sintepuh. Stitch along the edges if desired.

We decorate the crib with bows or other accessories, for example, fish. We admire!

cat in the pipe

materials
To make a similar original cat house, prepare: a wood tube of the required size (available at a hardware store), acrylic paint, sandpaper, wood glue, a ruler (or measuring tape), a piece of foam rubber or soft fabric for interior decoration.


We measure and cut the tube of the required size.


Cut out the stand
We draw two straight lines along the tube at a small distance from each other.

We cut along the marked lines.

Thus, we will get a rounded piece that will serve as a rack for our house. Sand the roughness with sandpaper.

Glue and paint
We paint the main structure and the stand outside. After the paint is completely dry, thoroughly glue the rack to the house. Turn the structure upside down and firmly clamp our stand to the base. Wait for the glue to dry (it will take about 30 minutes).

Glue a piece of foam rubber for softness.


Cozy details
Cover the bed with a blanket, put a small decorative pillow. You can also decorate it with curtains on the sides or hang a fun toy for the kitten.


Hanging cat house and shelves - original composition
Such an unusual project will be a real highlight in your home. Now the cat house imitates a hanging shelf, and real small bookshelves serve as steps for it.

We build a house from ordinary wood plywood, cutting out a doorway and a small window in the shape of a cat's face.
 But the most creative element of the composition is the cable bridge! It is made from cut strips of birch plywood and spacers connected to the cable. We buy it at a hardware store. Cable ties and clips for fastening will also come in handy. We use a laser cutter for cutting.
The final touch is rugs on the roof of the house and on the steps-shelves. We fix them with building glue.

Cat in a bag!
And this project will show an interesting version of a cozy couch that can be used in different ways.

Materials: dense felt fabric, bright fabric for decorative stars, 2 colors of threads - to match the stars and the bag itself, filler, sewing machine, scissors, needle, measuring tape, fabric clips, compass or round shape, pencil, paper, chalk for fabrics.
Cut out two circles for the bottom of the bag.
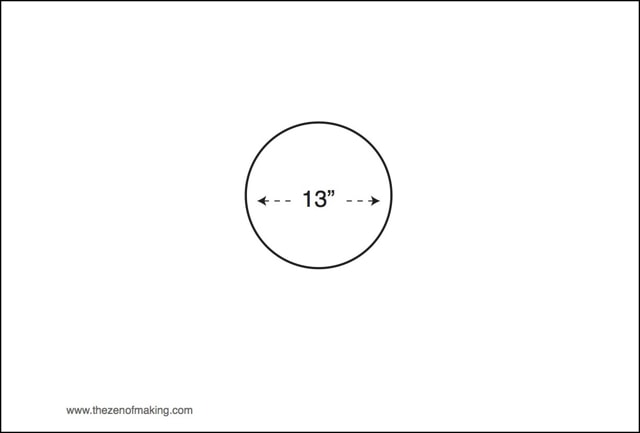
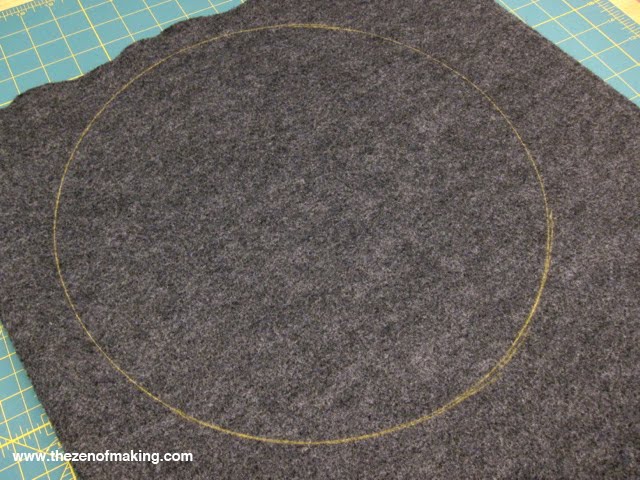
Sew the circles, leaving a small opening for filling.
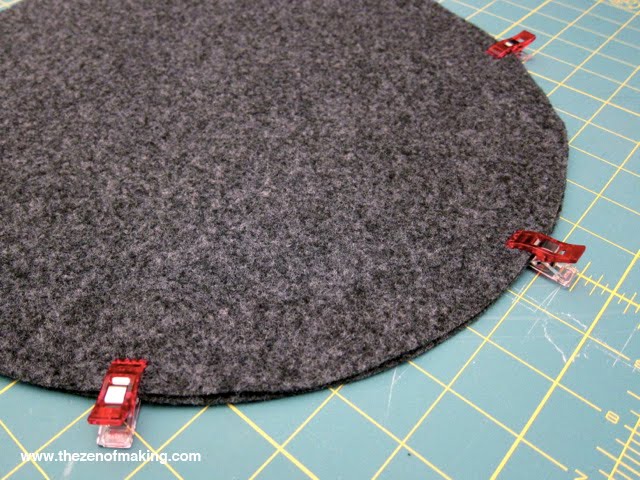
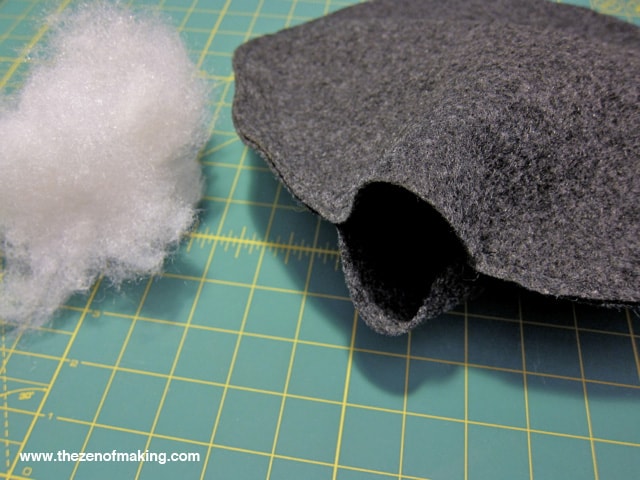
Evenly fill the bottom with filler and sew the hole.
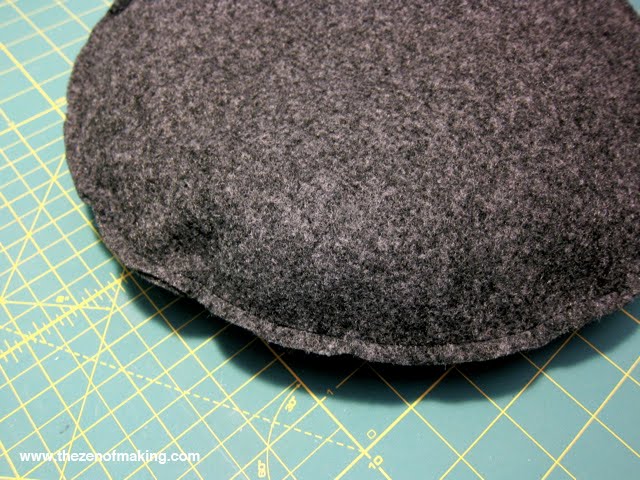
We form the side walls. We take measurements.
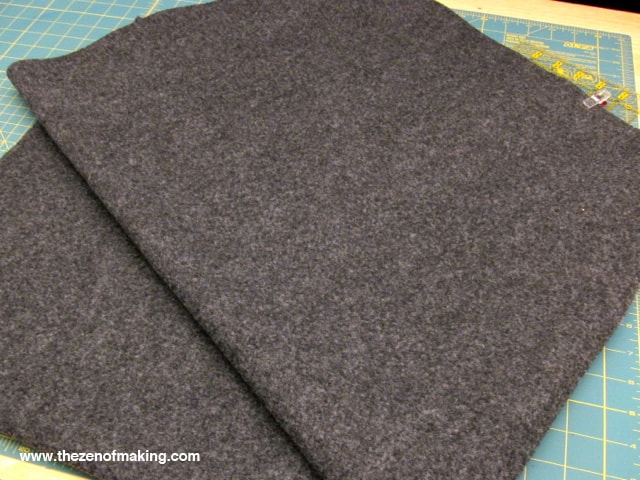
Cut out a large rectangular piece.
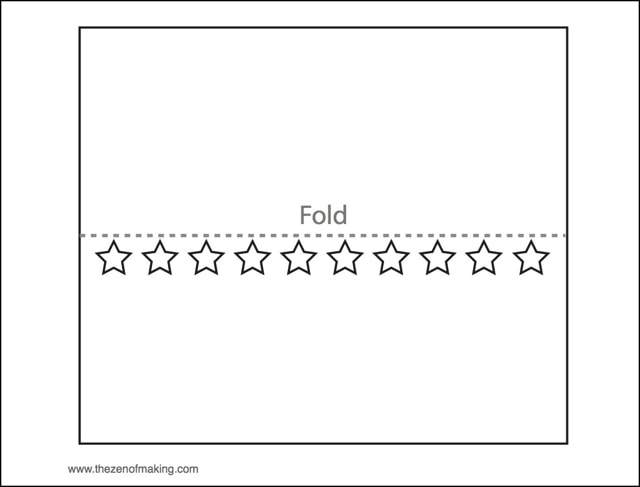
We fold the rectangle in half, and glue decorative stars on the outside just below the bend.
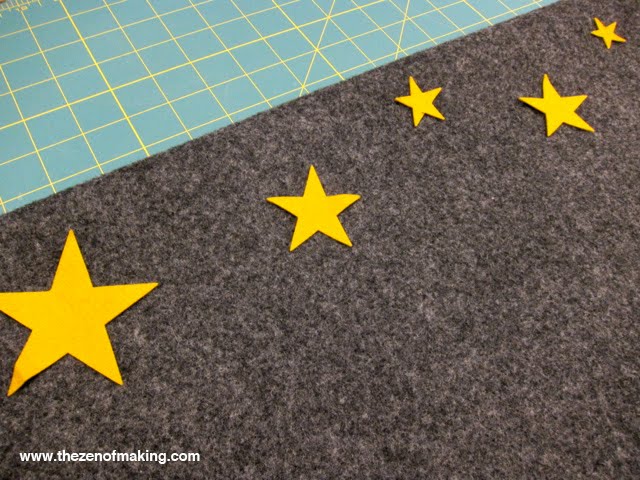
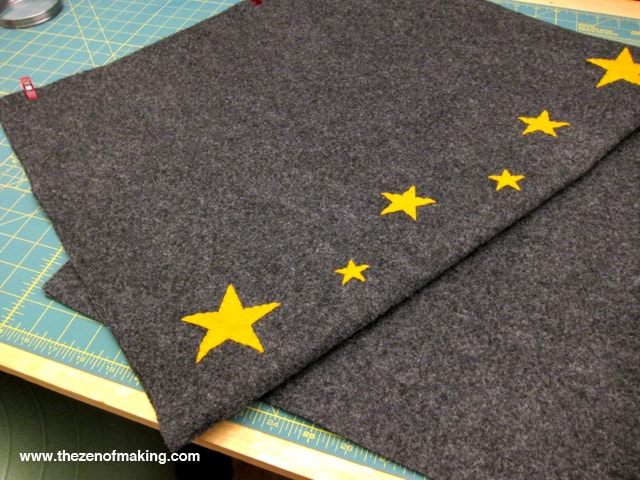
With a three-layer thread, sew the stars to only one side (try not to sew both!)


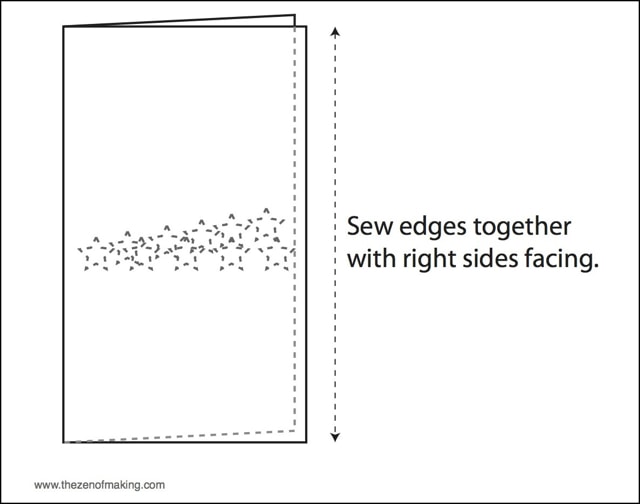
Fold the rectangle in half and sew the edges along the length. Turn the bag inside out, hiding the seam.
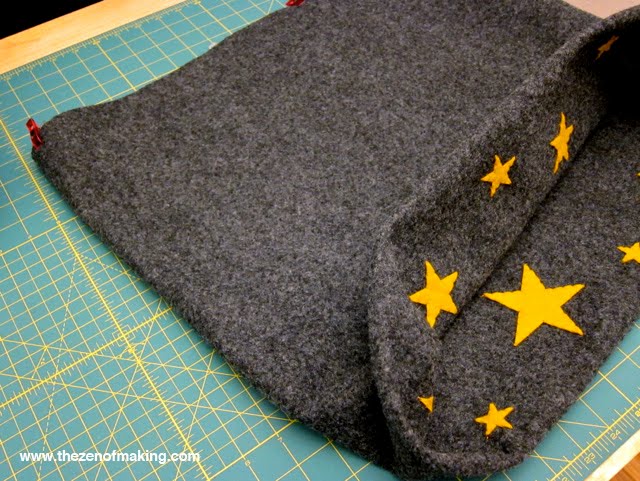
Fasten the pillow to the bottom with clamps.
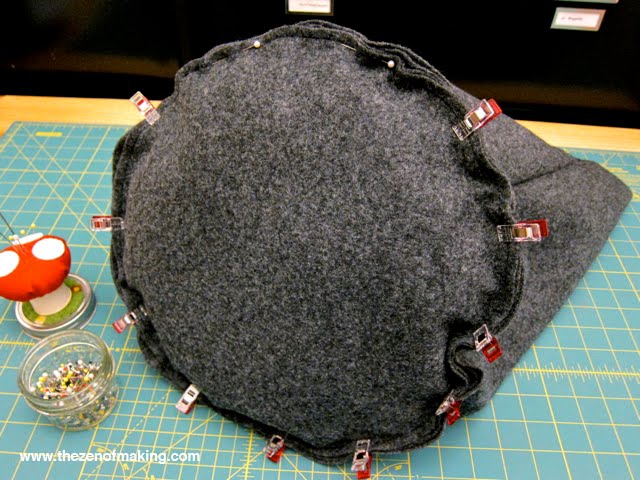
Sew it to the sides.
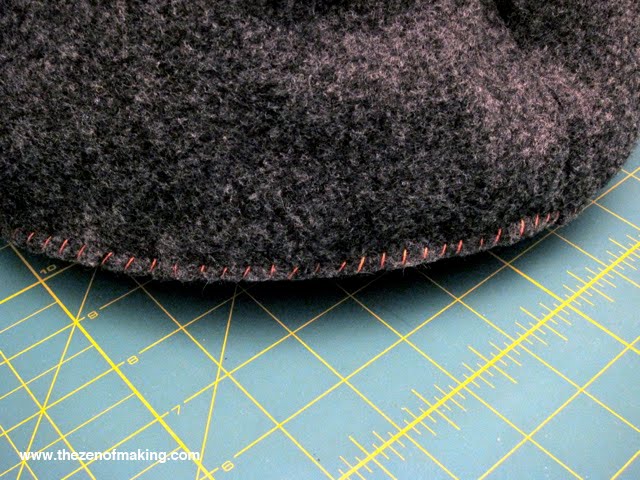
The sleeping bag for the cat is ready. But the most interesting is ahead - use cases!
Option 1 - cave
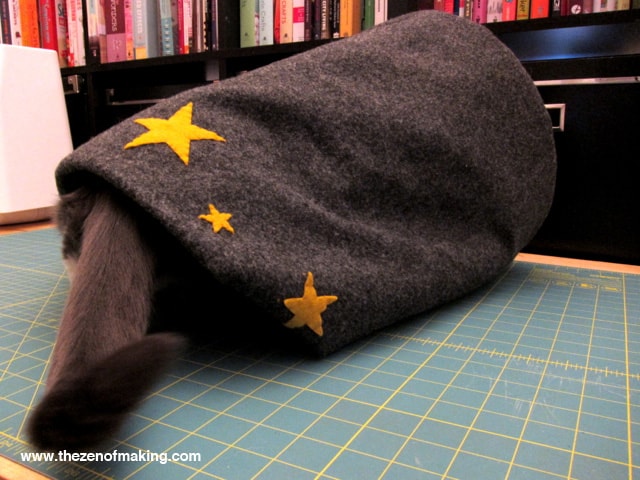
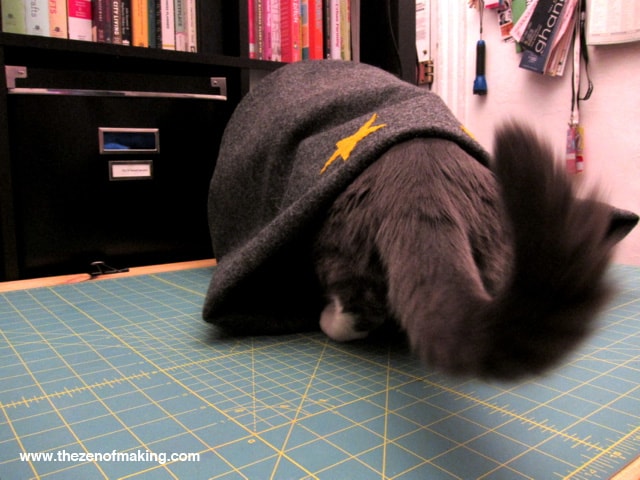
Option 2 - a cozy high sleeping bag
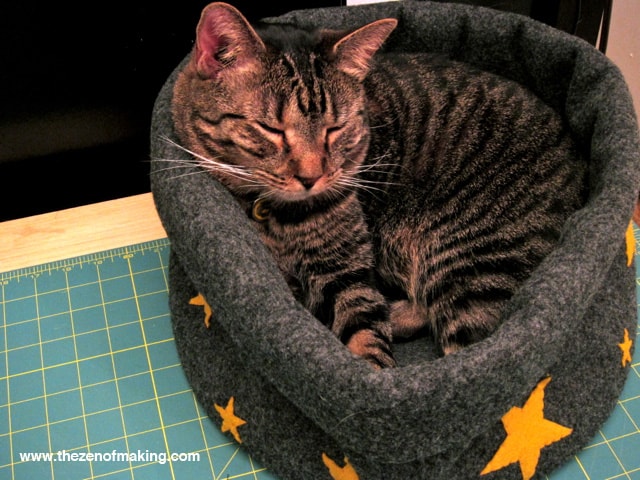
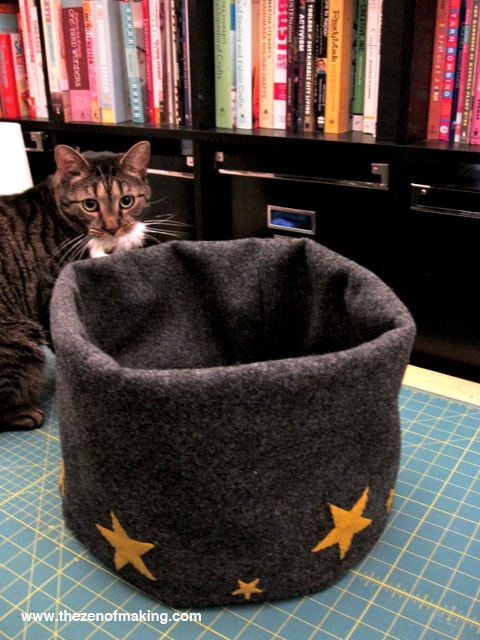
Option 3 - compact chair
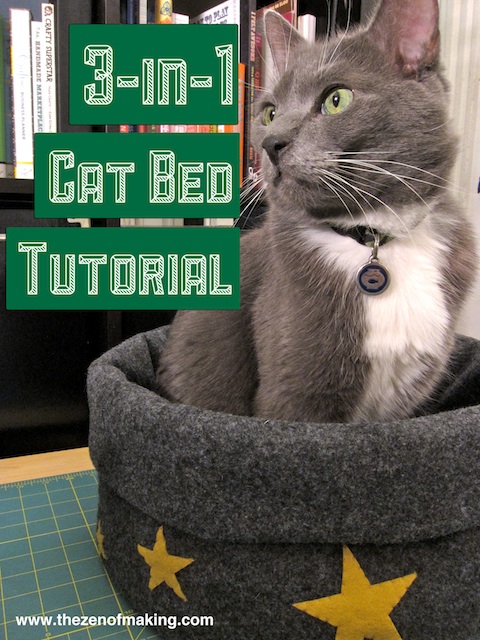
Luxury bed with columns

And we will start with such an ordinary table ...

... which we will turn into a luxurious cat bed.

Preparatory work
The headboard for the crib will be a finishing plinth, which we will cut to the desired size.

We will make the tips of the columns from old curly pens.

We will make the legs of the crib from pine wooden blocks.

We fix them with screws and wood glue.

Finishing frame is ready!


Let's add more beauty using pink marker paint.

We lay a beautiful mattress and call the main expert!

Tent for a cat
It's no secret that cats love boxes! Why not try to make a real tent out of it for your pet? The principle is the same as that of the “solar tent”.

materials

We collect the box.

Dismantling wire hangers.

We fasten the wires obtained from the hangers to the box.

For strength, glue the edges to the box with hot glue.

We fix the top by wrapping it with wire.

All that was left was to put on a T-shirt.

Turning an old sweater
A cozy and warm bed for a cat can be sewn from an old sweater. Prepare pins, filler (such as polyester), pillow, needle, thread and scissors.
Main source material

We sew the neck, we sew the transverse line between the sleeves (thus we separate the back of the future couch).

We fill the back and sides with polyester.


Sewing cuffs. 
We put the pillow inside.

We sew up the hole and fasten the sleeves to the base with pins.

We sew and take out the pins.

You can brag about the end result!

two-story building
A full-fledged two-story house can also be a great cat home project. A minimum of drawing skills, a good imagination and cardboard boxes will definitely come in handy in this case. And a few more details - a knife (or scissors), a ruler, a pencil.
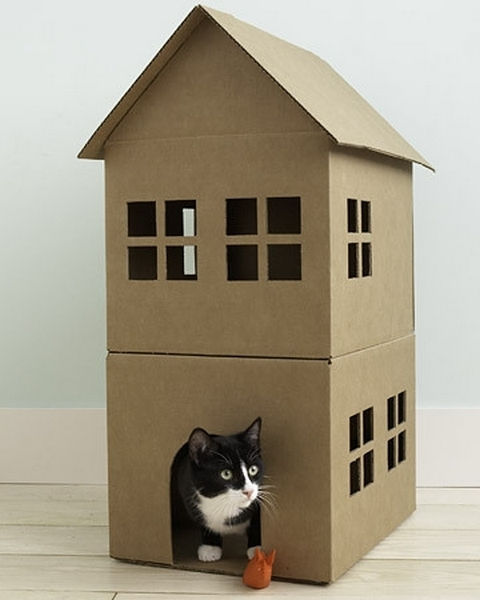
First of all, we cut out the door and windows, then we construct the roof. We glue it to the frame and you can decorate!

Another idea for a fun cardboard cat house
striped tent
If you have a Matroskin cat at home, make him such a tent. And then, for sure, she and your minke whale will be like two pair of boots.
Comfort Cube
And this house-cube is made of foam rubber, sheathed with a beautiful fabric. The work is not fun, but the result is amazing!
More Creative Cat House Ideas:


Feel free to experiment and implement unusual ideas in such an important project as a cat house. Believe me, not only the main owner will be delighted, but also all the surrounding guests and family members!
In this article, we will share ideas, methods and actual tips on how to make a house for a cat with your own hands. Step-by-step instructions with photos, detailed explanations of the production process and master classes will help you quickly and easily create an original cat house. Choose the option that fits perfectly into your interior.
Complex for a cat with scratching posts, a bed and a hanging toy
For games, sleep and relaxation, as well as for sharpening claws, you can build a cozy house for a cat with your own hands, which will not only decorate the room, but also bring benefits. This ideal complex for a cat will not take up much space. A spacious house is suitable for a large fluffy or pregnant cat. A vertical scratching post, a soft bed and a dangling toy will be great entertainment for adult animals. A cozy house and an inclined scratching post will be a favorite place for curious little kittens.
Materials needed for the base of the structure and the house:
- Fiberboard (hardboard) 40x122 cm (for the base);
- Chipboard 44x61 cm (for the roof of the house);
- Chipboard 55x44cm (for walls);
- 7 rails 3x4x37 cm (spacers for walls);
- a pipe with a diameter of 11 mm, a length of 60 cm;
- 2 bars (for pipe stability);
For the bed:
- Chipboard 44x30 cm;
- Fiberboard 44x30 cm;
- foam rubber measuring 44x30 cm;
For claws:
- rope made of cotton materials or jute with a thickness of about 110 mm, 15 m (for a vertical scratching post);
- rope or fabric (for an inclined scratching post);
- toy;
- board 18x41 cm;
Additional materials and tools:
- fabric or fur for covering;
- saw, manual or electric jigsaw;
- drill, screwdriver;
- knife, scissors, sandpaper;
- furniture stapler, hot glue gun;
- tape measure, pencil, chalk, marker.
The process of making a house for a cat with your own hands
First of all, it is necessary to cut out from the available materials chipboard and fiberboard rectangles: for the base of the house, walls and beds. The required sizes are listed above, but you can independently determine the size that suits you and is comfortable for your pet. On both rectangles for the walls of the house you need to draw circle with radii of about 27 cm. It is most convenient to do this with a compass, but not from the center of the rectangle, but slightly lower. You can use a marker if you attach a rope to it and hold it in the center of the future truncated circle.

One wall of the house will be solid, and on the second wall you need to draw hole circles for entry and several windows. Originally make them look like a cat's footprint. We will make a large circle 22 cm in diameter, and small ones 5.5 cm each.

do-it-yourself cat house step by step instructions Photo
Small side circles should be placed at a symmetrical distance from the large circle (equal to 17.5 cm). And the central small circle - to place a little further.

The next step in building a house for a cat with your own hands will be sawing. Carefully, using a drill, jigsaw or other suitable tools, you need to cut out small and large circles in turn.

Next, we combine both walls of the future house and mark the places where we plan to fasten them with slats. In our example, this is 7 points. They are most conveniently made by drilling through so that the marks are visible on both panels.

At all marked points, we drill recesses for self-tapping screws with a drill. Rails will be attached here.

We prepare slats: planing, leveling the edges, removing roughness. For stability, the lower rails can be made thicker.

We fasten both parts at seven points using prepared rails and self-tapping screws.

do-it-yourself cat house step by step instructions. Photo
Preparing wall fabric house. It should be slightly larger than the walls themselves. For the safety and convenience of the cat, it is better to choose fabrics with a cut pile so that the animal does not catch on the claws. You can use faux fur or other materials.

Cutting fabric with hot glue gun glue to making a house. It is best to use glue without a strong odor, it will probably not be liked by the cat.

On the front side of the house, we cut holes in the fabric in the right places, bend it and carefully fix it along the edges.

On the base for the complex (in the place where the house will stand) we place and glue foam rubber. Its size should correspond to the distance between the two side lower rails of the house. This will be the first couch, next to it we mark a place for a vertical pipe with a circle.

We completely glue the entire base of the structure cloth.

In order for the fabric to hold firmly, it will be better to fix it with staples using a furniture stapler. If there is fabric on the sides that begins to crumble, it needs to be wrapped. Next, we fix the structure from above with the help of a fiberboard sheet.
Let's prepare roof house. We mark allowances on the fabric with chalk and glue a sheet of fiberboard with it.

We take two not wide pieces of fabric and glue them to the inside of the two lower ribs. If you are using colored fabrics, use the base color here. 
Connecting base house. At this stage, it is important to choose the screws of the optimal length. They should hold the house firmly, but at the same time not protrude beyond the base. 
We hide the slats under the fabric. 
We place a fiberboard rectangle on the roof of the house and fix it with a furniture stapler. 
We hide the staples with small scissors in the fabric. 
Ennoble inner part house. Glue the fabric of the corresponding color. 
The do-it-yourself cat house is almost ready. The details remained: scratching posts and a couch. 
Preparing pipe made of cardboard, plastic or wood and two bars of a slightly smaller diameter. This guarantees the stability of the structure. In our example, a plastic pipe and wooden blocks are used. 
We firmly insert and fix the bars in the pipe, this can be done with glue or self-tapping screws (depending on the materials used). 
From rectangular sheets of chipboard and fiberboard we cut out the same semicircular parts for beds.
We string part of the fiberboard onto the pipe, having previously made a hole. This part will cover the bottom of the glued fabric. 
On the underside of the bed, we prepare holes for self-tapping screws. We connect the stove bench and the bar fixed in the pipe. 
Flip the house horizontally. We place the pipe parallel to the floor, substitute any objects under it to determine a suitable place for attaching the scratching post. 
We make marks on the bottom of the base, make holes for self-tapping screws, fasten the pipe. In our version, we made four holes for better fastening. 
The bottom of the pipe paste over with a cloth. Usually cats sharpen their claws by stretching their paws up. 
We cut the foam rubber of the desired size and glue it on the couch. 
We take a rope, attach it to one end toy, and fix the other side with a furniture stapler on the side to the base of the couch. 
We completely glue the top of the bed with a cloth, making allowances for its bend. We glue the fiberboard part so as to beautifully hide the edges of the fabric.

We deceive the pipe with a rope, periodically fixing it with glue. 
Cooking inclined scratching post. We trim the lower part so that it touches the base. Cover both ends of the board with fabric. 
The do-it-yourself cat house is almost ready. The central part of the inclined scratching post, on which the cat can sharpen its claws, is wrapped with a rope or cloth. We put the board on the base of the complex and fasten it to one of the rails between the walls of the house. 
Using our master class, you can independently supplement and complicate the design, increasing its size and the number of components. 
The scheme of the house for a cat in the form of a castle

Standard play complexes for cats usually take up a lot of space in the apartment. It is not always possible to allocate a territory to put such a structure at home. But if the desire to make your pet happy haunts you, then we suggest doinghanging housefor a cat with their own hands. And not just a house, but a whole castle! It is convenient to place it anywhere on the wall. You can make any number of turrets and connect them with ladders.
If there are small children in the house or there is a dog in addition to the cat, then such a hinged complex with a scratching post will be a favorite place for a mustachioed purr. There the cat will be able to sleep peacefully so that no one bothers him.

Materials required for the construction of towers:

In addition, you will need construction tools, such as a saw, a manual or electric jigsaw, a drill, a screwdriver or a screwdriver, a furniture stapler, a stationery knife or scissors, a pencil (marker) and a tape measure.

Planning and preparation stage
In our example, the dimensions of the turrets have a base of 34x34 cm, a wall height of 45.5 cm, the upper tier starts at a height of 30 cm from the lower base of the wall. Therefore, to build turrets, we need: a base, a side wall (34x44 cm in size), two small side walls (30.5x44 in size), a shelf 30.5x30.5 cm, two slats 5.5x44 cm, two slats 5.5x23 cm. The chipboard sheet is about 1.5 cm thick.
To make a cat house beautiful, comfortable and functional, you need to consider the size of the turrets. They should look harmonious in the room and be of sufficient height so that the cat can stretch and move inside. If the play complex for the cat will include two-tiered towers, then the size of the upper base should allow the cat to curl up and feel safe due to sides.
Do-it-yourself cat house step by step instructions
From chipboard sheet cut out according to the previously indicated dimensions of 9 rectangular parts.

We draw outlines of the tower: teeth, three pieces, 6.5 cm high and notches.

We take a large side wall, divide its side into 5 equal segments and put marks. (Side 34 cm, divide it by 5, we get 6.8 cm). We take smaller side walls, put them on top of the first wall, put thin side rails from the edges. Then we transfer the marks from the bottom wall to the smaller walls. This is necessary so that all the teeth are the same size.
We transfer the marks from the ends of the wall to its horizontal, draw a line of 6.5 cm. By connecting the points, we will get a finished drawing of the teeth.

Carefully along the lines sawing teeth jigsaw.

Next we do at the tower entrance, its width will be 20 cm, height 25 cm. We measure the same distance up and down from the center, mark the desired dimensions with dots. If desired, you can round the top line. In this case, you can set aside a segment of 12.5 cm from it. Draw an arc.

Doing jigsaw drawing entry.


We connect the side wall with the front wall with self-tapping screws.

In a similar way, we attach the second side wall. For convenience, we can put between them shelf.

We turn the tower over, add the base, which is also fastened with self-tapping screws.

At a height of 30 cm from the base, we make marks, recesses for self-tapping screws and fasten the shelf.

We fix two lateral horizontal and two vertical slats on the side, closing the sections of the walls.

Cut off a piece fabrics a little more than the height and width of the tower, try on and adjust the size.

We fix the fabric with glue or a furniture stapler, carefully shaping and wrapping the edges. In the area of \u200b\u200bthe teeth, we leave about 1.5 cm for a hem. It is important that the glue does not have a sharp repulsive odor.


With a narrow long piece of fabric (about 6.5 cm high), glue the teeth on the inside. Carefully glue the ends.


For side entrances prepare the fabric with a margin, try on and cut, then glue.

We make out ends at the entrance, and at the end we fix another piece of fabric from the bottom of the tower.


We select foam rubber details for the beds, wrap them with a cloth on the upper side, fasten with glue.

We fix the lower part of the foam bed with glue on the shelf, paying special attention to the edges.


We put fasteners on the back of the tower and hang it on the wall. Supplement at will ladder-scratching post, which can be created similarly to the first method by wrapping a board or pipe with a rope.


To make it convenient for a cat to climb into his house and crawl up the turrets, you need to come up with bridges between towers. It can be a piece of wood pasted over with a cloth. Using both a scratching post and bridges in the design, it is important that there is a gap for the cat against the wall.

It's so easy to make an unusual house for a cat with your own hands. If desired, you can build several towers of different sizes, hang them near the floor or high up against the ceiling. If you place the structure around the entire perimeter of the house, then it is better to make entrances to the turrets from three sides.


Do-it-yourself entertainment complex for a cat
Another option to allocate a place for your pet is to create an interior detail that is interesting for the cat and unusual for you in your home. WITH entertainment corner your pet will always be busy, even in your absence. We'll show you how to make a 3-tier kit for a cat.

Required tools:
- two tables of different sizes on low legs;
- rope, fabric or fur;
- stapler, glue;
- toys and decorative items;
- screw and screws;
- dye.
Step-by-step instructions for an entertainment corner for a pet
The first step will be table preparation. They should be disassembled, unscrew the legs, shelves (if any), countertops to decorate and improve. In our case, we use a fur part - a large piece of fur. With them, we want to completely close the shelf from the table. For fixing, the fur should be bent down.

In this way, we also decorate a small tabletop, fixing the fur from below with a stapler.
Table legs make great scratching posts, one has only to wrap them with tight ropes. You can wrap all the legs, you can only some of them. To fix the rope in the process of winding, you can fasten it with staples.

We suggest painting the remaining legs and other details of the tables in a different color with safe paint.

After the paint has dried, you can collect all the details.

We will put our smaller table on a large table, taking into account where the scratching posts look, so that it is convenient for the cat to use them. The top table can be glued, fixed with screws or self-tapping screws.
The final touch in the design of the do-it-yourself cat bed will be the addition toys and entertainment accessories. These can be hanging toys on ropes, a glued flower pot, a piece of carpet for claws. Fantasy is limitless.


Do-it-yourself multi-storey house for a cat
It will take a little more time and patience to build a multi-storey complex for a cat, but the beauty that will turn out in the end will please the little tenant of the house and its builder. In such a complex, you can sleep, and indulge, and sharpen your claws.

To make such a complex you will need:
- chipboard boards;
- electric jigsaw;
- fabric and rope;
- tape measure, pencil, scissors;
- login/window templates;
- glue;
- pipes made of plastic or cardboard;
- self-tapping screws, door hinges, screws, corners.
Multifunctional six-level house for a cat with your own hands step by step instructions
The first step is to prepare base complex, house and lower compartment with an entrance, which can be of any shape (circle, oval, rectangle).

We chose a figurine in the form of a cat's head, circled it on a sheet of chipboard, and then cut it out jigsaw.


From five rectangles we collect arbitrary in size box house, in our version, its length is 80 cm, height 30 cm, width 55 cm. The main thing is that the cat is comfortable.

On the remaining side part we hang loops for the next door.


We attach the door to the house on screws.

Between the floors we will have pipes, so we attach furniture corners to their base, with which it is easy to attach the pipe to the base.

Thus, with the help of pipes and chipboard panels, it is possible to build several floors, different in shape and size. At the same time, holes should be left in them for the cat. The layout of the cat house depends on your imagination.


From the side or between levels, you can attach to a multi-storey cat house stairs. Make it easy from ordinary boards. The ladder can be placed at an angle by turning the legs from below at an angle of 45 degrees. You can attach this element to the house with furniture corners.


On the top of the house, a house with gable roof. Its base will stand on several pipes, it is better if they are symmetrically located for balance.

From chipboard boards, we cut out parts that are suitable in size, form them into a structure, fix them with screws and furniture corners.

One side of the house or roof can be hinged, not only for the entertainment of the cat, but also for the convenience of opening and cleaning the home.

In our version, we made a house with a side entrance and a door on the roof.

The uppermost floor (that is, the attic) can be placed under the very ceiling or made from it a kind of step to the closet.

Using another pipe and a mini chipboard panel, we connect the cat complex to the top of the cabinet.

decorative trim
At the end of the construction of a house for a cat with your own hands, it is important to decorate it beautifully and make it a beautiful interior accessory.

We wrap all pipes with a rope or rope, fix them at the bases and at the tops with glue.

We glue roofs, walls, side and inner sides carpet.

We measure each detail, make the necessary holes in the carpet, try it on and fix it.

At corners and in hard-to-reach places for gluing, it is convenient to use a furniture stapler.


If desired, you can make the lining of all parts in one color or use several different ones. We made the roof of the house in green.

Particular attention should be paid to corners, ends and joints. At the ends in the hole area, it is good to use a furniture bar. It is smooth, easy to bend and takes the desired shape.


The master class for the construction of such a complex is very simple. Everyone can do it. Your cat will appreciate such a gift.

Do-it-yourself soft bed for a cat

Cats love to sleep, they are always looking for the softest, calmest and most comfortable place in the house. Give your mustachioed beast its own place to sleep and rest. You can make a do-it-yourself cat bed in just a couple of hours. This method does not require male skills; there are no complex details in the master class.

Materials for the manufacture of beds:

You can choose any size and shape for the bed. This method is also suitable for making dog beds.
Step by step instructions on how to make a cat bed
Choose a place where the bed will be located, this affects its shape. You can place the future design in a corner, on a window or under a table. We will make a classic oval shape. For an ordinary cat, a size of 40 or 50 cm in length is suitable.

An important step is choice of fabric. It should be pleasant, easy to care for and safe for the cat's claws. You can choose the color that suits the main shade in the interior.
We draw oval shape on a fiberboard sheet. This can be done in two ways.
The first way without using a compass. We draw a straight line, divide it in half by segments.

We fix the side points with pushpins or pins, put on them a thread connected at both ends. Using a pencil, pull the thread to the left side to make a triangle. We put a point.

With the same tension, draw a line around the buttons to get a nice oval.

Another way to get an oval shape is to draw it with compass.

We draw a segment, divide it into equal parts, put points A and B at its end. Draw with a compass two circles with centers at the end of the segment, with a diameter up to points A and B, respectively.

Above the intersection of the circles, draw arcs from the top points of the circles to each other. We get an oval.


We transfer it to the fiberboard panel and we cut out in this form 2 identical figures.

We measure and design the sides. To do this, we take foam rubber. Its length is equal to the length of our oval (135 cm), and the width will be 10 cm.

From a piece foam rubber we form a side. We fold the piece of foam rubber along the entire length in half and fix it with glue.


Preparing the cloth, with which we will cover the foam rubber. The fabric should be a few cm larger in width so that it is convenient to glue the structure to the bottom of the bed base. We chose a width of 14 cm.

We glue the foam rubber side and a piece of fabric.


Fixing the resulting side to the stove bench, leaving the free edge of the fabric on the outside.


We complete the semicircle by connecting the two ends of the side.


At the bottom of the bed we fix the fabric from the side.


To hide this part of the structure, we close it with the previously prepared fiberboard part.

We issue in the inside of the couch. Cut out the foam rubber. We apply and try on the size, it should be slightly smaller than the diameter of the bed.


We wrap the foam rubber with a cloth, making allowances. We fix them from the bottom side.

We apply glue to the part of the foam rubber that is not covered by the fabric and place the soft part in the center of the structure. You can do without glue, then the foam rubber should be completely wrapped with a cloth and sewn up with threads.

A compact and soft place for a cat is ready!


Master class: cat house out of the box
One of the most favorite pastimes for cats and cats is to find nooks and crannies where you can get comfortable. Even the simplest small shoeboxes instantly attract the attention of cats. What will be their joy to receive a house from a large cardboard box!
You can make a house for a cat from one large cardboard box (from under the technique) or from several small boxes. This will require:
- scissors or stationery knife;
- adhesive thermal gun;
- ruler or stencils (for windows);
- self-adhesive paper, paint or fabric (for decoration);
On the walls of the box, it is necessary to draw and then cut out windows and entrances, they can be of any shape and size. For stability, it is important to strengthen the corners, bottom and side walls with adhesive tape.

To make the house look like a real one, it is better to make its roof gable. To do this, you need to work with the top of the box, consisting of 4 rectangular parts (continuation of the walls). Two wide parts will become slopes, and two narrower ones will become gables (triangular parts of the walls). It is most convenient to fix the crash of the house hot glue.
Using this method of building a cat house with your own hands, you can make one house or entire tunnels, if the territory allows. The design can be painted with paint or glued on top with colored paper or wallpaper. If desired, you can insulate it from the inside and outside with various materials: foam rubber, carpet or fabric, and add a pillow for softness.
From an old t-shirt
One of the most basic ways to make a cat house at home is to build it from wire and an ordinary men's T-shirt.
For this you will need:
- cardboard or a piece of plastic;
- 2 metal hangers made of thin wire;
- pliers;
- T-shirt or other clothing with sleeves and a collar;
- pillow or foam rubber;
- pins or glue.
Let's prepare frame of the dwelling. Using pliers, we will straighten ordinary clothes hangers and install them on a cardboard base crosswise in the form of arcs. At the top, both wires must be connected with adhesive tape. We will pay special attention to fixing the arcs at all four points at the base. You can pierce the cardboard, bend the wire a little on the back side and secure it with tape. You can glue a fabric to the base, put foam rubber or a pillow for softness.

We put the T-shirt on the frame, stretch the fabric from above, fold it down and pin it with pins. The T-shirt should be positioned in such a way that an entrance is obtained from the opening for the collar. If desired, it is easy to leave windows on the sides of the sleeve house or make additional holes.

Other ideas for creating houses for cats and cats with your own hands
Original do-it-yourself cat houses can be made from wicker basket. Two baskets will make a cozy couch in the form of a pearl, and you can put a soft pillow on the bottom.

A house in the shape of a cat with sewn ears, eyes, tail and a hole resembling a yawning mouth. It is better to sew such a house from a dense fabric that holds its shape.

For a children's room or a corridor, a cat house made of colored wooden cubes. You can make several entrances in the form of geometric shapes and positively decorate the cubes on the outside.

A noticeable detail of the interior will be a cat house - wigwam with shelves. You can assemble it from wooden or cardboard boards fastened horizontally and vertically, lay a soft blanket inside, hang fabric instead of walls.

The easiest way to do wigwam for a cat- connect several sticks in the form of a cone, fasten them qualitatively at the top and at the base. Then cover the house with a cloth, make an entrance and windows.

A cozy house for a cat with your own hands will turn out if you dump it or create it from fabric (carpet) round mini house. Then make a cutout and decorate it around the edge with a knitted scarf.

Like the cat and hanging fabric house in the shape of a cone with one or more inputs. The main thing is to make a soft bottom. Such a composition can be hung anywhere.

Decorate the apartment with a laconic dwelling for a cat in the shape of an egg. Smooth and hard on the outside, but soft on the inside due to the bedding, the house, along with the owner, will take center stage on the window or shelf.

Vertical house with scratching posts and a cylinder in the center very compact and functional. The cat will be able to hide inside or frivolously lie down on the top couch, watching what is happening around.

It's no secret that taking a cat into the house, we, in addition to enjoying communication with our beloved pet, acquire a lot of responsibilities and even problems. One of these problems is known to many cat owners - torn wallpaper, puffs on curtains and upholstered furniture. This beloved pet sharpens its claws.
You can’t argue with nature: it is impossible to wean an animal from sharpening its claws, since this need is inherent at the level of instincts. To help your beloved pet and save the furniture, provide the cat with a convenient place for the “manicure” of claws, or better, a special design that will combine both the house and the simulator. And we will tell you in a step-by-step master class how to make such a scratching post for a cat with your own hands.
Of course, you can buy the finished product in the store. There are many such products that combine everything at once in pet stores. However, their sustainability is questionable.
Why is it better to make your own claw sharpener?
The stability of most purchased structures is achieved due to the retractable stop, that is, the house will stand at a distance between the ceiling and. Young, healthy, active animals will not miss the opportunity to climb this stop, which, most likely, will sooner or later lead to the fall of the structure. The supports themselves are, which also does not add structural strength.
In addition, such houses are designed for installation in rooms with a standard ceiling height, since the stop extends to a certain length. In apartments with high ceilings, for example, in "Stalinka", you cannot install such a structure, you will have to order an emphasis of the required height from the manufacturer, wait for the order for several weeks, and it will cost much more.
Based on the foregoing, a reasonable question arises: why buy a structure in a store, and even pay a lot of money for it? It is better to do something yourself from building materials, while saving money.
homemade house cost
Having calculated the cost of a manufactured house, we can say that such a house will cost about three times cheaper than a similar finished structure purchased at a pet store. In addition, a home-made house in terms of functionality, stability and reliability is significantly superior to similar factory products.
Project planning: scheme, dimensions
To make a scratching post, you must first develop a design project, prepare the necessary tools and purchase the necessary building materials. 
A practical and safe design option would be to place five crawling and jumping platforms, a rectangular house, a hammock and a small platform on top of a long pole on three supporting pillars. If there are several pets in the house, then it is advisable not to distribute the platforms evenly, since one cat, jumping on the platforms like stairs, will not let another cat sleep if he decides to do so on one of the shelves. 
Thus, on one base there will be three thick pillars connected by the first platform. The second platform will connect the longest and shortest pillars, and the third one will be placed under the rectangular box (house) and will connect the main pillar with the middle one. Next, there will be a house itself, above which two platforms of different sizes will be located on the main (longest) pillar.
Preparation of tools and building materials
To create a house with a scratching post, you should prepare the following tools: a screwdriver, a jigsaw, an electric stapler, a reciprocating electric saw.
You should also purchase the following materials:

Any material can be used as a cover for the house and platforms. Carpet is soft, durable and wear-resistant, so we will give preference to it. As for pole wrapping rope, hemp rope can also be used, but jute rope looks better and is more durable.
Attention! It is better not to use cardboard for such a design, since the resulting scratching post will not meet the requirements for safety and stability. After all, cats are active creatures, and they need strong support.
How to make a scratching post with a house: step by step instructions with a photo
Before proceeding with the construction process, there are a few things to consider. First, decide on the height of the future product. The maximum height of a stable structure is 2.2 m, so we make the highest support post of this length. To do this, we saw off a piece 2.2 m long from the bar. This will be the support post. 
Secondly, the basis for the structure must be stable. We cut a sheet of plywood into 6 equal pieces (approximate size - 750x500 mm) and take one of them as the basis. The remaining pieces of plywood will be needed to make platforms. The preparatory stage is over, we proceed directly to the manufacturing process.
Making the base frame
- First of all, in the platforms that will be mounted below the house, we cut holes for the supporting pillars. We will leave the platforms that will be attached to one pole and placed above the house for the last.

- On each platform, which will be located below the house, with a pencil we make marks where the pillars will supposedly be located.
- To simplify your task, you can make a stencil from a sheet of drawing paper with the positions of the pillars marked on it relative to each other.
- By marking the platforms through a stencil, you can be sure that the platforms will fit regardless of their geometric shape.
- The first link shelf will be the largest. It can be made rectangular (the cat will easily jump from the ground to such a height), or you can cut a semicircular groove in it. The more holes and gaps there are in the design, the more interesting it will be for cats to climb on it, so we make the first platform with a large corner round hole. From the sawn piece in the future we will make a wall with an entrance for the house. We make the remaining three platforms according to the same principle: either we leave them rectangular, or with the help of a power tool we give them a curly shape.

- In the prepared platforms, we make holes for the supports. In the opposite corners of the rectangles drawn with a stencil, we drill holes with a drill with a diameter of about 12 mm, then with a jigsaw we cut out the grooves for the supports. Grooves are best done a little more than required. Otherwise, even a slight deviation of a millimeter may interfere with the assembly of the structure.

- We assemble the finished platforms into one structure to make sure that the supports fall into the grooves.
Before proceeding with further assembly, the platforms should be upholstered with carpet, since it is problematic to upholster the platforms already attached to the pillars. We do this with an electric stapler, it is much easier and faster than doing it manually.
Next, we attach the platforms to the pillars. To do this, we make marks on the pillars that will help place the platforms parallel to each other. For fidelity, we make marks on all sides, so it will be more convenient to screw the corners in the future. We fasten the corners that will hold the first shelf directly to the posts, and fasten the corners that will hold the remaining shelves directly to these shelves. After that, we assemble the structure, that is, we screw the platforms to the poles. You can even not yet screw the supports to a single base, the platforms already securely hold the structure intact.
Making a house for a cat: a master class
As the constituent elements of the structure of the house, we take pieces of plywood cut in advance. From one piece 75x50 we make the floor and ceiling, from the other - the side walls and the end. The wall with the entrance to the house is already ready - it remained when cutting out the first lower platform.
We screw the corners to the side walls and bottom and collect all the elements together. Even if the box turned out to be not very even, do not be upset, the carpet will hide everything.
We start upholstery of the house with carpet. We make upholstery both outside the house and inside, we fix the carpet with the help of an electric stapler.
We fasten the house to a structure consisting of pillars and lower platforms. For this we use a screwdriver. You can simply screw the house to the pole, but in this case the stability of the structure is unreliable. To ensure better stability, it is better to pass a support inside the house along the corner.
After that, we proceed to winding the poles with a rope. To do this, carefully wind the rope in a circle around the pole, pressing it to the base after each turn. We attach the rope to the pole using an electric stapler.
Making a hammock where it will be comfortable for both the cat and the kitten
Using a jigsaw, we cut out a frame from a piece of plywood, tighten it with material and carefully attach it to the pole. It is possible to use carpet for the manufacture of a hammock, but it is better to purchase a special material for this purpose, which is just as durable, but not so dense. To attach the hammock to the pole, we use large corners with a stiffener. The fact is that this structural element is mounted on only one support, while it must withstand the weight of one cat lying in the center. 
It is quite possible that the cat will not sleep in a hammock, but will use it as a kind of springboard or simply play with threads sticking out of the scratched fabric. In any case, a hammock will be used.
At the final stage, we mount the roof of the house and fasten the entire structure to the base. The design is quite heavy and relatively stable, so you can attach the poles to the base using self-tapping screws. To provide greater stability, you can additionally attach the main support of the structure to the wall using a large bracket.
Today, the behavior of cats has been studied enough, so the owners are familiar with their habit of sharpening their claws from personal experience. However, one should not think that they act in this way only in order to annoy their masters. It happens on an instinctive level. This is required by their nature. Do not forget that cats are predators, although they differ in size from their wild relatives. This explains the urgent need to sharpen claws. Owners who know what they have to face before getting a cat in the house, be sure to first get a scratching post to help keep the furniture in the house.
Living in the wild, cats and their relatives sharpen their claws using tree trunks. Since their claws are constantly growing, and also at a high speed, they must sharpen them, otherwise it will be difficult for them to move while hunting. In some animals, the claws can grow into the paws, because of which the cats feel severe pain. Therefore, they need a hard surface so that they can sharpen their claws and not experience discomfort.
Pets are limited in this regard, although if an ornamental tree grows in the house, they can use its surface for sharpening their claws. However, if there is no suitable item in the house, then the owners need to resolve this issue as soon as possible and purchase or make a scratching post.
What is the purpose of this device? Many cat owners have the wrong impression that their pets are tearing carpets or sofas intentionally. However, in reality, everything is not so: cats only follow the call of nature, maintaining their claws in proper condition. It is impossible for a person to change this situation. It remains only to do everything possible so that cats can induce a "manicure" without harm to the home environment.
If you have realized the urgent need for a scratching post, then you should not rush to the pet store and choose the right claw sharpener. Any owner can make the simplest version of this device on their own. This will allow him to save a lot, as well as get an additional reason to be proud of himself.
Why is it better to make a cat house with your own hands?
If we consider the design of shop scratching posts, then their stability is ensured by a retractable stop. In other words, most of these devices look like a house, which is placed gap between floor and ceiling. Seeing such a pipe, young cats will definitely have a desire to climb on it. However, if they do this too often, then over time the device will begin to stagger and at some point fall.
Plastic pipes are used to make claw post supports, but it is not able to provide sufficient strength to this device. In addition, many devices are designed for use in apartments with a standard ceiling height. They are equipped with an emphasis of a strictly defined length. In apartments with a high ceiling, it will not be possible to use such devices, so the owner will have to think about purchasing a custom-made scratching post. Naturally, its cost will be much higher than ready-made models. However, it is not necessary to spend a lot of money on this device, because you can make a cat house yourself, saving a lot of money and time.
DIY cat scratching posts
For starters, it doesn’t hurt to get to know the cat scratching post better. You should know that the cat's house must have certain characteristics so that it can perform its functions effectively:

Project Planning
Before you start making scratching posts on your own, the following questions need to be addressed:
- draw up a design layout;
- prepare the necessary tools;
- purchase building materials.
Be sure to decide which version of the cat house you will make: portable or stationary. If a young active cat lives in your house, then it is recommended to fix the structure to the floor to make it more stable.
It is also worth paying attention to the color of the decoration of the cat house. To do this, focus on the design style of the room where you are going to install the claw sharpener. Make sure that the upholstery material not only looks beautiful, but also has sufficient strength. Calculate the height of the device in advance, correlating it with the characteristics of the animal. The size of the scratching post should be large enough for your pet to stretch out to its full height when it wants to sharpen its claws.
If you live in a small apartment, then you can choose one of the following cat house options:
- rope post;
- personal rug on the wall;
- thicket;
- corner design.
How to make a scratching post for a cat with your own hands: materials for making
First of all, you need to prepare materials to make a cat house:

Do-it-yourself scratching post: step by step instructions
After the necessary tools and materials are ready, you can start assembling a cat scratching post with your own hands. Do-it-yourself master class on making a cat house describe in the following steps:
- The base of the structure. It will require wooden boards, the length of which is calculated taking into account the size of the pet. If you are making a scratching post for a short animal, then you can use boards 40 x 40 cm. To make it convenient for large cats to sharpen their claws, it is better to take boards 50 x 50 cm. We take prepared upholstery fabric, for example, carpet, and spread it on the floor, remembering that that the wrong side should be facing the ceiling. We put a board on it. Then we note the required amount of fabric: for this, the board must be placed with an indent from the edge by 5 cm. Next, we process the pattern with glue, and then apply it to the board. To keep the material well, we additionally fasten it with nails.
- vertical column. Here we need furniture corners. With their help, we will install a plastic pipe to the base. However, first you have to check the dimensions of the pipe and, if necessary, adjust them. When determining the height of the pipe, it is necessary to proceed from the size of the animal, however, it should not be lower than 50 cm. When the pipe is installed, we wind a hemp rope around it from below. At the very beginning, its free end must be fixed to any corner. During winding, the rope should fit as tightly as possible to the pipe, this is a guarantee of its integrity during use by the animal. The other end of the rope must be fixed in a hole that will have to be made in the upper part of the pipe.
- Sunbed. You can make the scratching post more functional by arranging a lounger on the top of the pipe. It is made by analogy with the base. The difference is that the space between the board and the fabric is filled with foam rubber. On this stand, the animal will be pleased to lie. When the bed is ready, it is fixed to the end of the upper pipe using furniture corners that are attached to screws or nails.
You can also offer many other ideas for making scratching posts with your own hands.
rope post
 If you do not want to bother making the above cat house, then you can make an easier option - rope post. A master class on how to create it looks like this: we need a wooden beam, a plastic pipe or a board. On the base you need to wind the rope. This must be done very carefully so that each turn is as rigidly adjacent to each other as possible. For greater strength, the rope is fastened with nails, driving them in at a distance of 10 cm from each other.
By following these fairly simple steps, you will have an excellent tool for sharpening claws. In order for the animal to start using the post, it is placed on a heavy stable base and fixed to it. This will allow you not to worry that the cat will be able to turn over the device while sharpening its claws.
If desired, you can add a shelf with upholstery to the end of the pipe. Having played enough, the animal will begin to look for a suitable place to rest.
Personal rug on the wall
 You will bring joy to your pet if you make for him such a version of the scratching post as personal mat mounted on the wall. This design will be of interest to those owners who do not have the time or desire to manufacture bulky claw sharpeners. It is easy to make such a rug, because for it you will need very affordable materials: wooden planks, carpet, felt or other dense upholstery material and self-tapping screws.
So, let's move on to the master class. First, we take the fabric and cut out a flap from it, which we hang on the wall, fixing it with the help of planks. They are attached on all sides so that the structure takes the form of a square or rectangle. When you get a small cat in the house, you can easily teach her how to use this device. If you are making a scratching post for an adult animal, then you can let him know what it is if treat the rug with your pet's favorite scent.
thicket
You can also do it even easier without spending a lot of time and effort on making a special device for sharpening claws. While walking, try to find a dry tree without leaves or a thick branch with a large number of knots and branches. The branch will serve as an excellent material for making a scratching post, which can turn into a real gymnastic corner for an animal.
Corner scratching post
This version of the cat house for sharpening claws can function as a wall that your pet can climb on.
For greater clarity, we will describe a master class for the manufacture of this device. To make it, you will need boards that should match the width of the door jamb. On top of them fasten dense furniture fabric or wind the rope. When the clipper is ready, it is attached to one side of the door frame. Usually it occupies the entire height of the opening. Having access to such a device, the cat will be able to sharpen its claws, as well as perform other movements necessary for development - to pull up, climb up and down the door jamb.
The cost of a homemade scratching post
 Making a homemade scratching post is very profitable, since the costs in this case are 3 times less than if you purchased the device in a store. In addition, a home-made claw clipper is superior to the store counterpart in terms of its performance characteristics. It is distinguished by such qualities as increased functionality, stability and reliability.
Conclusion
Every cat owner knows that his pet regularly has a desire to sharpen his claws. So that the animal does not harm the furniture in the house, it is recommended to take care of the presence of a special device in the house - scratching posts. And for this it is not necessary to go to the pet store, because you can make it yourself. If you follow the step-by-step instructions for creating this device, then you can make functional and reliable device for your pet. If the owner does not have enough time, then he can choose simpler scratching post options, which will allow him to save even more.


What is the difference and subtleties of cooking
Colic in infants: symptoms and how to save the baby from pain
Bunk bed Adel 3 assembly instructions
The most numerous twins born at the same time
Topics to talk about with a girl Things to talk about with a girl 14